Getting started with the Smart Product Sorter app is quick and easy. Follow these simple steps to set up your product sorting and begin organizing your store for a better shopping experience:
1. Install the Smart Product Sorter App
First, download and install the Smart Product Sorter app from the Shopify App Store. Once installed, you can access the app directly from your Shopify admin.
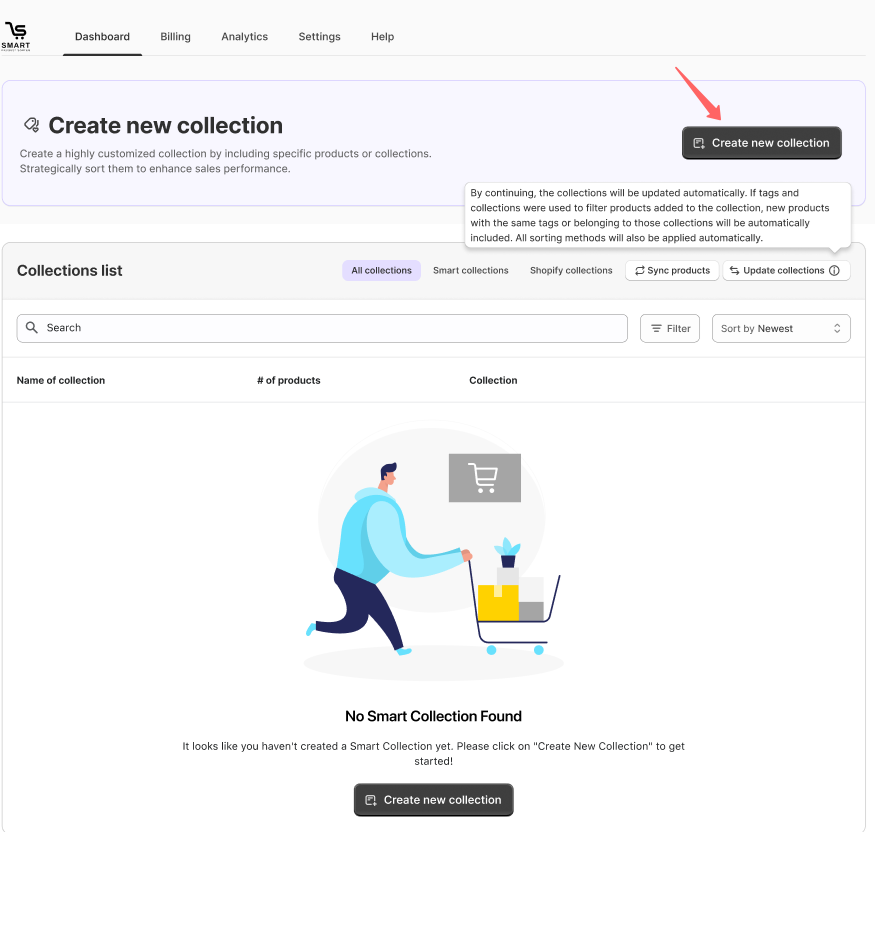
2. Browse the Dashboard and Create a New Collection
After installation, explore the app’s dashboard. Click on "Create New Collection" to start organizing your products. You can then define the criteria and sorting rules for this collection.
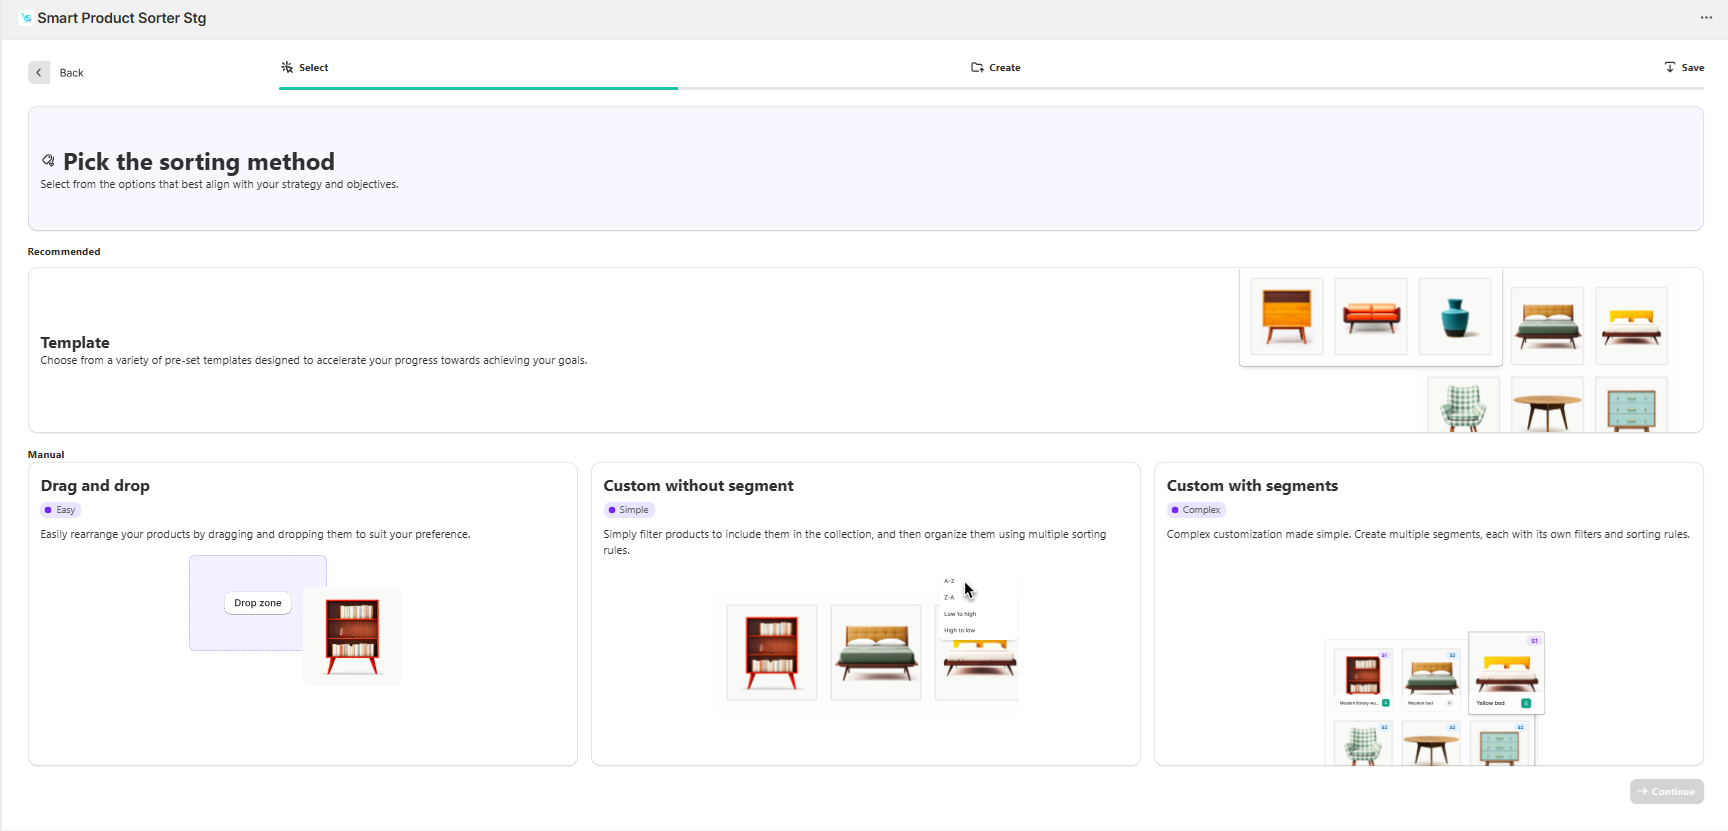
3. Choose Your Sorting Method
Decide on a sorting method based on your needs. Whether you prefer drag-and-drop, custom sorting with or without segments, or using templates, you can choose the most suitable option. You can always change this later as your store’s needs evolve.
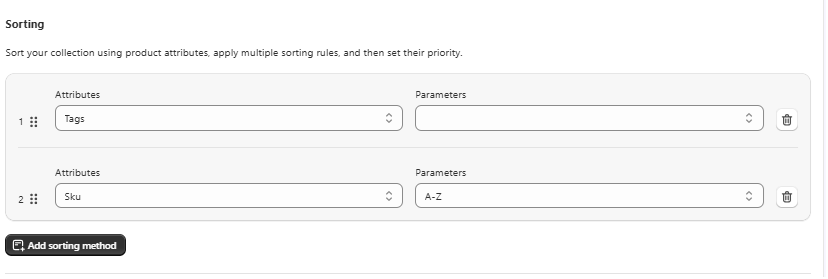
4. Apply Sorting to Collections
Once your method is chosen, start applying your sorting rules to specific collections. You can rearrange products or define custom sorting rules.
5. Save and Review
After setting up your sorting preferences, be sure to save your changes. Then, preview your collections to ensure everything looks how you want it. You can tweak settings at any time to refine the display as needed.
By following these steps, you can quickly set up Smart Product Sorter and begin optimizing your product display for a more organized and effective store.